
What is the suggested workflow to replace the eye mesh? I see you can choose a high and low poly eye mesh, and so I assume you can make additional ones, in Blender or otherwise. What do I need to do? on the technical side, the mesh itself I can handle.
Thank you!
Making a custom Eye mesh.
Moderator: joepal
7 posts
• Page 1 of 1
Making a custom Eye mesh.
![]() by Mireneye » Thu Mar 22, 2018 5:31 pm
by Mireneye » Thu Mar 22, 2018 5:31 pm
- Mireneye
- Posts: 6
- Joined: Thu Mar 22, 2018 5:28 pm
Re: Making a custom Eye mesh.
![]() by brkurt » Fri Mar 23, 2018 3:03 am
by brkurt » Fri Mar 23, 2018 3:03 am
It's actually pretty simple. You will need a UV sphere in Blender, and then you will need to replace the single point with a set of quads.
Then decide what kind of eyeball you want; I prefer to keep the sphere, because I like how it rigs (personal preference).
Finally you will need an eye image. I usually go to http://www.3dxo.com/
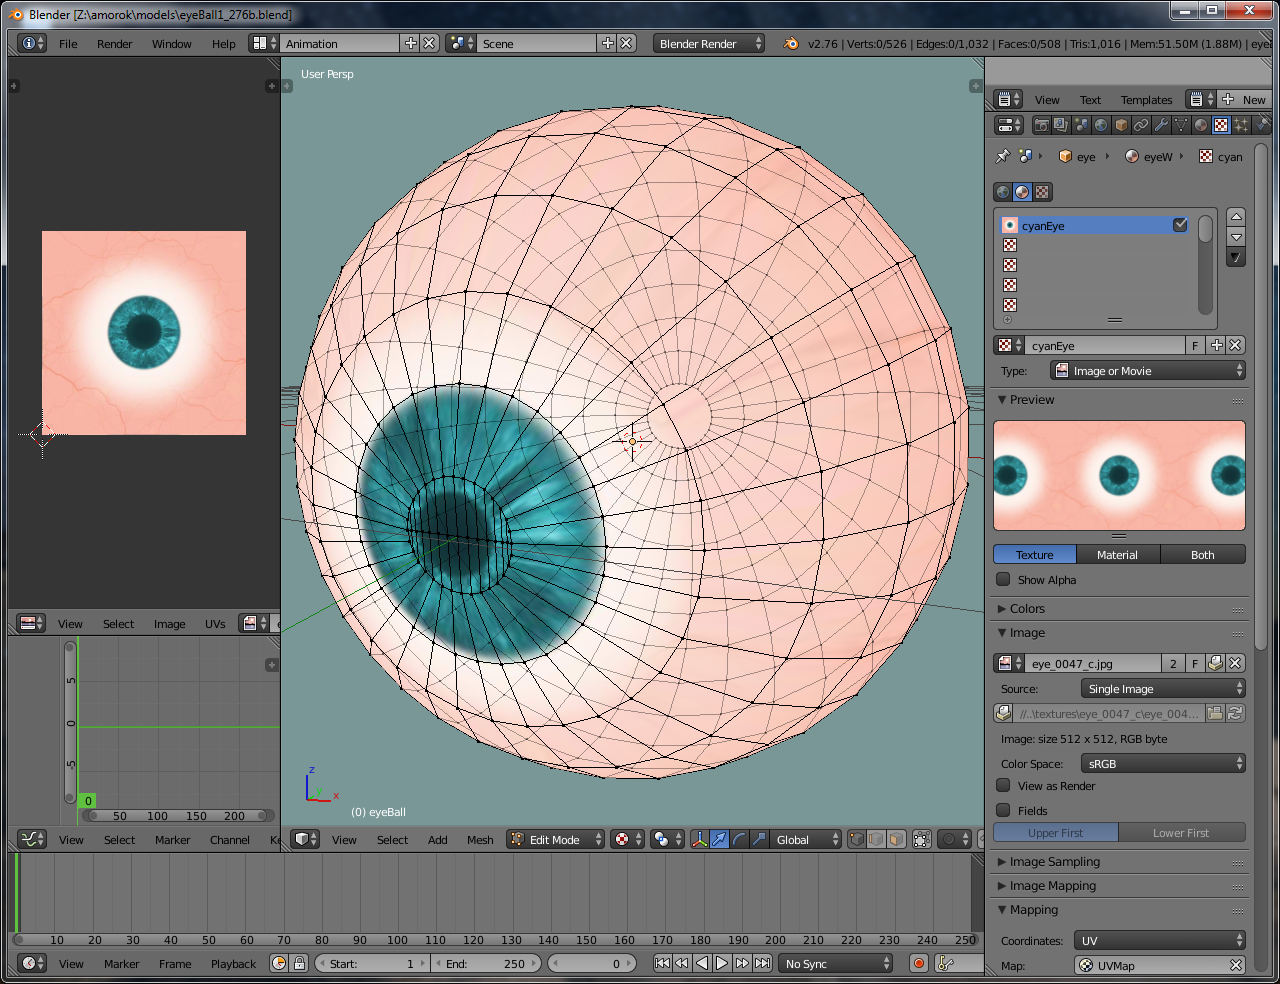
I chose a cyan eye for this model.
Now, to the nit picky part. I'm not going to explain how to assign a material to the eye, or map a texture to it; that's all over the net.
What you will need to know is how to move the UV Map around, so that you get the pupil the right size, and the right place.
What I'll do is give you the model to work with, and a screenshot.
http://www.geekopolis.ca/tutorials/cyanEyeBall1_276b.blend
Then decide what kind of eyeball you want; I prefer to keep the sphere, because I like how it rigs (personal preference).
Finally you will need an eye image. I usually go to http://www.3dxo.com/
I chose a cyan eye for this model.
Now, to the nit picky part. I'm not going to explain how to assign a material to the eye, or map a texture to it; that's all over the net.
What you will need to know is how to move the UV Map around, so that you get the pupil the right size, and the right place.
What I'll do is give you the model to work with, and a screenshot.
http://www.geekopolis.ca/tutorials/cyanEyeBall1_276b.blend
- brkurt
- Posts: 1100
- Joined: Sun Feb 17, 2008 8:49 pm
Re: Making a custom Eye mesh.
![]() by jujube » Fri Mar 23, 2018 5:48 am
by jujube » Fri Mar 23, 2018 5:48 am
(The next step is to turn the eyes into clothing via makeclothes. There should be vertex groups on the new eyes and the model's eyes, that have the same name. Then the eye mhclo file can be moved to the right directory.)
- jujube
- Posts: 404
- Joined: Fri Aug 14, 2015 10:46 pm
Re: Making a custom Eye mesh.
![]() by Mireneye » Sun Mar 25, 2018 4:08 am
by Mireneye » Sun Mar 25, 2018 4:08 am
Thank you for being super helpful!
I've ran into a few questions/issues. Maybe you can guide me in the right direction.
I'm working with a very specific eye mesh that was made for Unreal Engine 4. First the mesh had to be scaled properly and so on and so fourth, then I had to make it all quads somehow which I fixed. And I also have to combine/merge the four UV maps somehow. It's a single mesh (I believe) with 4 Uvs. Very specific for realistic in-game rendering.
1, I scaled it to the mesh provided in this thread. However the position when you import a MakeHuman body to create clothing/an eye is not right. Do I have to tweak the position? or is this singular eye in the right place?
2, How can I go about combining the UVs, is there a way to get this working at all with MH?
3, What do you mean
3, "There should be vertex groups on the new eyes and the model's eyes, that have the same name." Excuse me I didn't quite understand that part?
4,"Then the eye mhclo file can be moved to the right directory" I'll have to find the file to move as well. Not sure where it dumps it.
I realize this is all probably obvious to you. And I'm sorry. When it's all said and done I have a plan for releasing a nice tutorial on how you can get quality results from MH exports to UE4. On that journey, any help is appreciated.
Cheers and thank you once more!
- Mireneye
- Posts: 6
- Joined: Thu Mar 22, 2018 5:28 pm
Re: Making a custom Eye mesh.
![]() by joepal » Sun Mar 25, 2018 10:43 am
by joepal » Sun Mar 25, 2018 10:43 am
Maybe this is helpful: http://www.makehumancommunity.org/wiki/ ... tex_groups
In order to match a vertex on the clothes with a vertex on the body, they have to belong to vertex groups with the same name. For example "left eye" or "nose" or similar, arbitrary names.
If there is low complexity, you can go with the default groups (left, right, mid), but in the case of the eyes, this is not sufficient.
- joepal
- Posts: 4473
- Joined: Wed Jun 04, 2008 11:20 am
Re: Making a custom Eye mesh.
![]() by Mireneye » Sun Mar 25, 2018 12:54 pm
by Mireneye » Sun Mar 25, 2018 12:54 pm
I also found that resource. From my base body mesh imports I could only find the three vertex groups. Mid/Right/Left, seems fishy. I would have used the proper one if I could just find it. As a preview, I went ahead and just applied the mesh later to check what we could get if we automated the process.

When it's exported it deforms oddly. I guess because of the vertex groups?
I'm not done with adding to the MH meshes and textures. I really want it to be a viable option for UE4 users, and perhaps at some point make a good guide on how to get most out of it.
Cheers!
When it's exported it deforms oddly. I guess because of the vertex groups?
I'm not done with adding to the MH meshes and textures. I really want it to be a viable option for UE4 users, and perhaps at some point make a good guide on how to get most out of it.
Cheers!
- Mireneye
- Posts: 6
- Joined: Thu Mar 22, 2018 5:28 pm
Re: Making a custom Eye mesh.
![]() by Aranuvir » Sun Mar 25, 2018 3:54 pm
by Aranuvir » Sun Mar 25, 2018 3:54 pm
The vertex groups are used to bring your asset and the human mesh together. Both, the asset mesh and the human mesh must have the same vertex groups by name, except the human mesh can have the "Delete" vertex groups as an option, which will feed a face mask. Each vertex of the asset mesh must belong to exactly one of the vertex groups. On the human mesh this is not so strict. You can select only parts of the mesh or the helper geometry to be added to the vertex groups. And a vertex can belong to more than one group.
The simplest way to do so is to create three vertex groups, left, right, middle. This process can be automated. E.g. if you want to create leggings (which are symmetrical along the x axis, i.e. sagittal plane) just select the leggings and hit the "create vertex groups from selection" button, which will sort the vertices of the leggings to the left, right and middle group. Of course, you can do this by hand, too. Next, on the human mesh you will probably want to fit them to the red tights helper. So, in edit mode select the vertices of the red tights and only these vertices (!) (easiest way to do so: select by material), then hit CVGFS again. You probably should control your vertex groups after this process. BTW, hidden vertices are not considered selected.
For eyes the process should be the same (though I did not test it). Select your eyes, hit the CVGFS-button, then select the human mesh and in edit mode just select the vertices with the eye material and hit the CVGFS button again. Perhaps you need to feed the Delete vertex group, too (by hand). If this doesn't work, you will probably have to create your vertex groups completely by hand...
- Aranuvir
- Posts: 1314
- Joined: Sun Oct 12, 2014 2:12 pm
7 posts
• Page 1 of 1
Who is online
Users browsing this forum: No registered users and 1 guest